As the chilly winds of winter make their annual debut, there’s nothing quite like stepping into a warm and cozy home. The key to ensuring that your living space remains a haven of comfort during the colder months lies in having a heating system that’s perfectly sized for your house. Sizing a heating system may sound like a technical endeavour reserved for experts, but fear not – in this guide, we’ll break down the process into practical, everyday terms. Whether upgrading an existing system or installing a new one, understanding how to size a heating system accurately is the first step towards achieving optimal warmth and efficiency in your home. So, let’s dive into home heating and discover the secrets to finding the perfect fit for your unique living space.
Calculate Home’s Heat Loss to Size a a Heating System for Your Home
Calculating your home’s heat loss is foundational in sizing a heating system. This process involves determining the amount of heat your home loses to the surrounding environment, helping you understand the heating capacity required to maintain a comfortable indoor temperature.
- Assess Insulation Levels: Evaluate the insulation in your walls, floors, and ceilings.
- Analyze Window Efficiency: Window is a significant contributor to heat loss. Consider the type, size, and condition of your windows. Energy-efficient windows can reduce heat loss, impacting the overall heating system size needed.
- Evaluate Door and Wall Efficiency: Inspect exterior doors and walls for insulation and efficiency. Poorly insulated doors and walls can be responsible for substantial heat loss, influencing the sizing requirements for your heating system.
- Check for Air Leaks: Identify and seal any air leaks in your home. Drafts and air infiltration can contribute to heat loss, affecting the accuracy of your heating system’s size calculation.
- Consider Ceiling Heights: Taller ceilings result in larger volumes of air that need to be heated. Consider the height of your ceilings when calculating heat loss to ensure your heating system adequately addresses the space.
Determine Insulation Levels to Size a Heating System
Understanding the insulation levels in your home is essential to size a heating system. Proper insulation is like a cozy blanket for your house, preventing heat from escaping and ensuring energy efficiency. Here’s how to go about determining insulation levels:
- Inspect Walls, Floors, and Ceilings: Examine the type and thickness of insulation in your walls, floors, and ceilings. Different areas of your home may have varying insulation needs, and knowing the existing levels helps assess heat retention.
- Identify Insulation Materials: Take note of the materials used for insulation. Common types include fibreglass, cellulose, foam board, and spray foam. Each material has different thermal properties, influencing how well it retains heat.
- Check for Gaps and Settling: Insulation can settle or develop gaps over time, reducing its effectiveness. Inspect the insulation for any signs of settling or gaps, as these issues can compromise your home’s ability to retain heat.
- Consider R-Values: R-values measure the resistance of insulation to heat flow. Higher R-values indicate better insulating properties. Understand the R-values of your insulation materials and their recommended levels for your region.
- Assess Attic Insulation: The attic is a critical area for insulation. Verify the depth and quality of insulation in your attic space, as inadequate insulation here can significantly impact heat loss.
- Evaluate Crawl Spaces and Basements: These areas often require specific attention when it comes to insulation. Check the insulation levels in crawl spaces and basements to ensure consistent coverage throughout your home.
Consider Climate and Regional Factors
To size a heating system for your home, it’s crucial to factor in the climate and regional conditions. The climate of your location directly influences the heating requirements, as colder climates demand more robust heating solutions. Here’s how to consider these external factors:
- Identify Local Climate Characteristics: Different regions experience varying temperature extremes and seasonal changes. Recognize whether your area has mild, moderate, or harsh winters; this information is pivotal in determining the heating capacity needed.
- Consult Heating Degree Days (HDD): HDD measures how much and for how long the outside air temperature is below a certain level, typically 65°F (18.3°C). Understanding the HDD for your location helps estimate the heating load and, subsequently, the size of the heating system required.
- Account for Humidity Levels: Humidity affects the perceived comfort level in your home. In humid climates, heating systems may need to work harder to maintain a comfortable temperature. Conversely, in drier climates, moisture levels can influence heating requirements.
- Consider Altitude and Elevation: Homes at higher altitudes may experience lower air pressure and thinner air. These factors can impact combustion efficiency in certain heating systems, and adjustments may be necessary for optimal performance.
- Evaluate Outdoor Design Temperatures: Determine the outdoor design temperature for your region, which represents the lowest expected outdoor temperature. This information assists in sizing the heating system to ensure it can meet the demands during extreme weather conditions.
- Check Regional Energy Codes: Local energy codes and regulations may prescribe specific efficiency standards for heating systems. Ensure compliance with these codes to not only meet legal requirements but also to maximize energy efficiency.
Evaluate Window Efficiency
Windows plays a pivotal role in the thermal performance of your home and can significantly impact the sizing requirements for a heating system. Assessing window efficiency involves scrutinizing various aspects of their insulation properties and overall performance. Here’s how to evaluate window efficiency:
- Check Window Type and Material: Different window types and materials have varying insulation capabilities. Single-pane windows provide less insulation than double-pane or triple-pane alternatives. Additionally, low-emissivity (low-E) glass enhances insulation by reducing heat transfer.
- Examine Window Frames: The material and design of window frames contribute to overall energy efficiency. Insulated frames, such as those made from vinyl or fibreglass, can help minimize heat loss compared to traditional aluminum frames.
- Consider the U-Factor and Solar Heat Gain Coefficient (SHGC): The U-Factor measures the window’s insulation effectiveness, indicating how well it prevents heat from escaping. A lower U-Factor signifies better insulation. SHGC measures the window’s ability to block heat from the sun; a lower SHGC is desirable for colder climates.
- Assess Window Seals and Weather Stripping: Check for gaps, deteriorating seals, or damaged weather stripping around windows. These issues can lead to drafts and heat loss, affecting the overall energy efficiency of your home.
- Verify Window Orientation: The direction your windows face can impact solar heat gain. South-facing windows receive more sunlight, potentially reducing the heating load, while north-facing windows may require additional insulation.
- Consider Window Area: The total square footage of windows in your home influences heat gain and loss. Large, poorly insulated windows can result in increased heat transfer, affecting the heating system size needed to maintain a comfortable indoor temperature.
Account for Doors and Exterior Walls to Size a Heating System
Doors and exterior walls are key components in your home’s thermal envelope, and assessing their insulation properties is essential to size a heating system. Heat loss through these elements can significantly impact the overall heating requirements. Here’s how to account for doors and exterior walls:
- Evaluate Door Insulation: Check the insulation level of exterior doors. Solid-core doors with weather stripping provide better insulation than hollow-core doors. To minimize heat transfer, consider upgrading doors, especially those leading to the outside.
- Assess Exterior Wall Insulation: Examine the insulation in exterior walls, including the type and thickness of materials used. Well-insulated walls contribute to heat retention, reducing the workload on the heating system.
- Check for Gaps and Cracks: Inspect doors and walls for gaps, cracks, or areas where air might infiltrate. Sealing these openings with weather stripping or caulking helps prevent heat loss and ensures the heating system operates efficiently.
- Consider Wall Construction: The construction of exterior walls influences their insulating properties. Different materials like brick, wood, or insulated concrete have varying thermal conductivity. Evaluate the composition of your walls to understand their impact on heat transfer.
- Examine Glass Doors and Windows: Glass doors, especially sliding or French ones, can have lower insulation values than solid ones. Assess the efficiency of glass doors and consider adding curtains or blinds to improve insulation during colder seasons.
- Evaluate Wall Exposure: The orientation of exterior walls affects the amount of sunlight and prevailing winds they are exposed to. South-facing walls may receive more sunlight, influencing heat gain, while north-facing walls may require additional insulation.
Assess Room Sizes and Layout
Understanding the sizes and layout of rooms within your home is crucial when sizing a heating system. The heat distribution must be efficient to ensure that every corner of your living space enjoys optimal warmth. Here’s how to assess room sizes and layout:
- Measure Room Dimensions: Accurately measure each room’s length, width, and height. The total cubic footage is essential for determining the heating capacity required to maintain a comfortable temperature.
- Consider Open Floor Plans: If you have an open floor plan, the heat distribution becomes a more intricate consideration. Larger, interconnected spaces may require a heating system with a higher capacity to cover the entire area effectively.
- Identify Zoning Needs: Zoning involves dividing your home into different heating zones, each with its thermostat. Assess whether specific areas of your home require different heating levels, allowing for customized comfort and potential energy savings.
- Account for High Ceilings: Rooms with high ceilings require additional heating capacity to address the larger air volume. Consider the ceiling height when sizing the heating system, ensuring it can warm the entire space efficiently.
- Evaluate Room Insulation: The insulation level of individual rooms can vary. Consider whether certain rooms have higher or lower insulation values and adjust the heating system size accordingly to maintain consistent comfort throughout your home.
- Factor in Room Usage: Different rooms serve various purposes, and their usage influences the desired temperature. For example, bedrooms may require a different heating approach than living spaces. Tailor the system size to meet the specific needs of each room.
- Consider Sunlight Exposure: South-facing rooms often receive more sunlight, potentially affecting heating requirements. Evaluate the exposure of each room to natural light and adjust the heating system size accordingly.
Factor in Ceiling Heights
Ceiling heights can significantly influence the heating requirements of a space. Taller ceilings result in larger volumes of air that need to be heated, impacting the overall capacity of the heating system. Here’s how to factor in ceiling heights when sizing a heating system:
- Measure Ceiling Height: Accurately measure the height of each room’s ceiling. Standard ceiling heights are typically around 8 to 9 feet, but some homes may have vaulted or cathedral ceilings that exceed these norms.
- Calculate Cubic Footage: The total cubic footage of a room is crucial for sizing a heating system. Multiply the room’s length, width, and height to obtain the cubic footage. Taller ceilings result in a larger air that needs to be heated.
- Consider Air Circulation: Taller ceilings may affect the distribution of heated air. Warm air tends to rise, so rooms with high ceilings may experience temperature variations between floor and ceiling levels. Consider the placement of vents and fans to enhance air circulation.
- Adjust Heating System Capacity: Rooms with higher ceilings may require a heating system with a greater capacity to ensure efficient warming of the entire space. The increased air volume means more heat is needed to achieve and maintain a comfortable temperature.
- Evaluate Insulation at the Ceiling Level: Check the insulation levels at the ceiling level, especially in rooms with taller ceilings. Adequate insulation helps prevent heat loss through the ceiling, ensuring the heating system operates efficiently.
- Account for Heat Stratification: Heat stratification occurs when warm air accumulates at the ceiling. This can lead to a perceived temperature difference between the floor and ceiling. Consider features such as ceiling fans to help redistribute warm air throughout the room.
Check for Air Leaks
Air leaks can negatively impact the efficiency of a heating system by allowing warm air to escape and cold air to infiltrate your home. Identifying and sealing these leaks is crucial in ensuring that your heating system operates optimally. Here’s how to check for air leaks:
- Inspect Window and Door Frames: Check for gaps or cracks around window and door frames. These areas are common culprits for air leaks. Seal any noticeable openings with weather stripping or caulk to prevent drafts.
- Examine Exterior Wall Openings: Inspect the exterior walls for openings such as utility penetrations, gaps around pipes, and vents. Seal these areas with appropriate materials to prevent air infiltration.
- Check Attic Access Points: The access points to your attic, such as doors or hatches, can be sources of air leaks. Ensure these areas are properly insulated and sealed to prevent warm air from escaping.
- Inspect Baseboards and Crown Molding: Gaps along baseboards and crown moulding can allow air to seep through. Use caulk or sealant to fill these gaps and create a more airtight seal.
- Examine Electrical Outlets and Switches: Wall outlets and light switches on exterior walls can contribute to air leaks. Install foam gaskets behind switch plates and outlet covers to reduce heat loss.
- Evaluate Fireplace Dampers: If you have a fireplace, check the damper for a tight seal when not in use. An open damper can allow warm air to escape, making your heating system work harder.
- Inspect Ductwork: Leaky ducts can lead to significant heat loss. Examine the joints and connections of your ductwork and seal any visible gaps or cracks. Consider professional duct sealing for more thorough results.
- Use a Smoke Test: Perform a smoke test by holding a lit incense stick near potential leak areas. Watch for any noticeable movement of the smoke, as it indicates air movement. Address leaks accordingly.
- Assess Weather Stripping: Check the condition of weather stripping around doors and windows and replace the damaged ones with a new one.
- Consider Professional Energy Audits: If you need clarification on the extent of air leaks in your home, consider hiring professionals for an energy audit. They use specialized tools like thermal imaging cameras to identify hidden leaks.
Evaluate Ductwork Efficiency
The efficiency of your ductwork is a critical factor in determining the efficiency of your heating system. Well-designed and properly maintained ducts ensure that warm air reaches all parts of your home without unnecessary heat loss. Here’s how to evaluate ductwork efficiency:
- Inspect for Leaks: Check the entire duct system for leaks or disconnected sections. Leaky ducts can result in significant heat loss before the warm air reaches its intended destination. Seal any visible gaps or holes with appropriate duct tape or mastic.
- Evaluate Insulation: Assess the insulation surrounding your ductwork, especially in attic or crawl spaces. Proper insulation helps prevent heat loss or gain as the air travels through the ducts.
- Check for Obstructions: Make sure that there are no obstructions, such as debris, dust, or even pests, inside the ducts. Blockages can impede airflow and reduce the efficiency of your heating system.
- Examine Duct Design: Evaluate the design of your duct system, considering factors such as the size of ducts, the number of bends, and the distribution of vents. A well-designed system ensures proper airflow and even heating throughout your home.
- Inspect Duct Seals and Connections: Examine the seals and connections at joints and intersections. Poorly sealed or disconnected ducts can lead to air leaks, decreasing the overall efficiency of the heating system. Use mastic or metal tape to seal any gaps.
- Consider Duct Material: Different duct materials have varying thermal properties. Flexible ducts, for example, may lose more heat than rigid ducts. Evaluate the material used in your ductwork and its impact on heat transfer.
- Assess Airflow Balance: Ensure that the airflow is balanced throughout your home. Rooms at the end of long duct runs may receive less heated air. Adjust dampers or consider a zoned heating system to balance airflow.
- Check for Proper Sizing: Ducts that are too small or too large can affect system performance. Verify that the ducts are correctly sized for the heating system’s capacity, preventing issues like reduced airflow or pressure imbalances.
- Evaluate Return Air Intake: Check the return air intakes for any obstructions. A restricted intake can impede the efficiency of your heating system by limiting the amount of air that can be heated.
Select the Right Heating System Type
Choosing the right heating system is a pivotal decision that directly impacts your home’s comfort and energy efficiency. Various heating system types are available, each with its own advantages and considerations. Here’s a guide on how to select the right heating system type:
Gas Furnaces: Ideal for areas with access to natural gas. It is efficient and cost-effective but requires a gas line.
Electric Furnaces: Suitable where gas is unavailable. Generally costlier to operate but simpler to install.
Gas Boilers: Common in areas with a gas supply. Provide radiant heat through baseboards, radiators, or radiant floor systems.
Oil Boilers: Suitable for homes without gas access. Efficient, but oil prices can fluctuate.
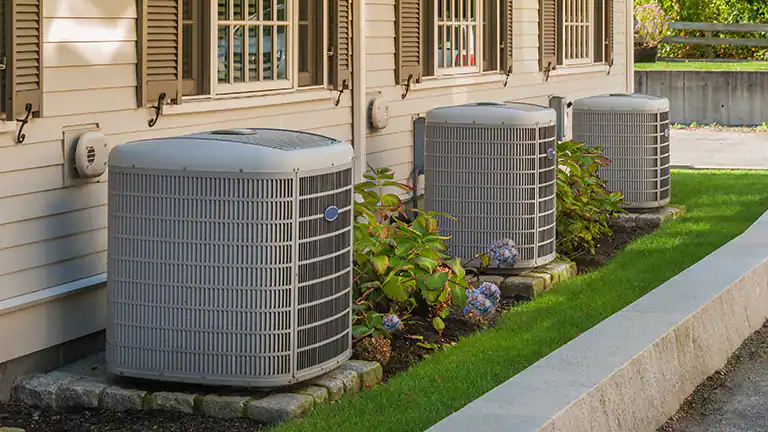
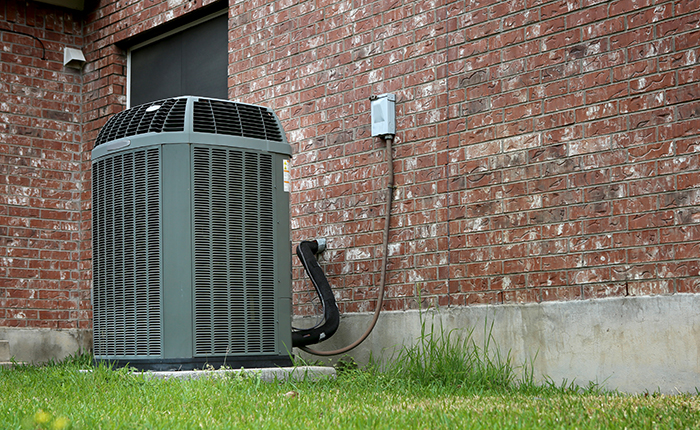
Air-Source Heat Pumps: This heating system transfers heat between indoor and outdoor air. It is efficient for moderate climates but may struggle in extreme cold.
Ground-Source (Geothermal) Heat Pumps: Extract heat from the ground: more consistent efficiency but higher installation costs.
Hydronic Radiant Heating: Uses water heated by a boiler to warm the space through tubes in floors, walls, or ceilings.
Electric Radiant Heating: Utilizes electric coils or mats under floors for localized heating.
Ductless Mini-Split Systems:
Efficient for Zone Heating: Allows independent temperature control in different rooms. Suitable for homes without ductwork.
Combination Systems:
Hybrid Systems: Combine a furnace with a heat pump for energy-efficient heating and cooling.
Dual-Fuel Systems: Use both a gas furnace and a heat pump, switching between the two based on outdoor conditions.
Consider Energy Efficiency Ratings:
SEER (Seasonal Energy Efficiency Ratio): Measures cooling efficiency for heat pumps and air conditioners.
AFUE (Annual Fuel Utilization Efficiency): Measures the efficiency of gas furnaces and boilers.
HSPF (Heating Seasonal Performance Factor): Measures the efficiency of heat pumps in heating mode.
Evaluate System Features:
Programmable Thermostats: Enhance energy efficiency by allowing temperature adjustments based on your schedule.
Zoning Systems: Divide your home into zones for independent temperature control, reducing energy consumption.
Consider Environmental Impact:
Green Heating Options: Explore renewable energy sources like solar panels or biomass heating systems for reduced environmental impact.
Consult with an HVAC Professional
Engaging with a qualified HVAC (Heating, Ventilation, and Air Conditioning) professional is a crucial step in ensuring that your heating system is tailored to meet the specific needs of your home. Here’s how to effectively consult with an HVAC professional:
Schedule a Home Assessment:
Arrange for an on-site visit from an HVAC professional. They will assess your home’s size, layout, insulation, and heating infrastructure.
Share Your Heating Preferences:
Communicate your heating preferences and lifestyle considerations. Discuss factors such as desired temperature levels, energy efficiency goals, and any specific comfort requirements for different rooms.
Provide Utility Information:
Share information about available utility options, such as natural gas, electricity, or oil access. This information influences the selection of the most suitable heating system for your home.
Discuss Budget Constraints:
Clearly outline your budget constraints for the heating system installation, including any long-term cost considerations. This helps the HVAC professional recommend options that align with your financial goals.
Inquire about Energy Efficiency:
Seek advice on energy-efficient heating systems and inquire about available rebates or incentives for environmentally friendly choices. An HVAC professional can guide you toward systems with high AFUE, SEER, or HSPF ratings.
Explore Zoning Possibilities:
Discuss the possibility of zoning systems to cater to individual comfort preferences in different areas of your home. Zoning can enhance energy efficiency and reduce utility costs.
Ask About Maintenance Requirements:
Inquire about the maintenance needs of various heating systems. Understanding the upkeep requirements helps you plan for ongoing servicing and ensures the longevity of your system.
Consider Future Home Improvements:
If you have plans for home renovations or additions, discuss these with the HVAC professional. They can recommend a heating system that accommodates potential changes to your living space.
Evaluate System Upgrades:
Discuss potential upgrades, such as programmable thermostats, smart home integration, or air quality enhancements if you are upgrading an existing system.
Request Multiple Quotes:
Obtain detailed quotes for different heating system options, including installation costs, equipment prices, and any additional expenses. Compare these quotes to make an informed decision.
Clarify Warranty and Service Plans:
Understand the warranty coverage for the selected heating system and inquire about available service plans. A comprehensive warranty and service agreement provides peace of mind.